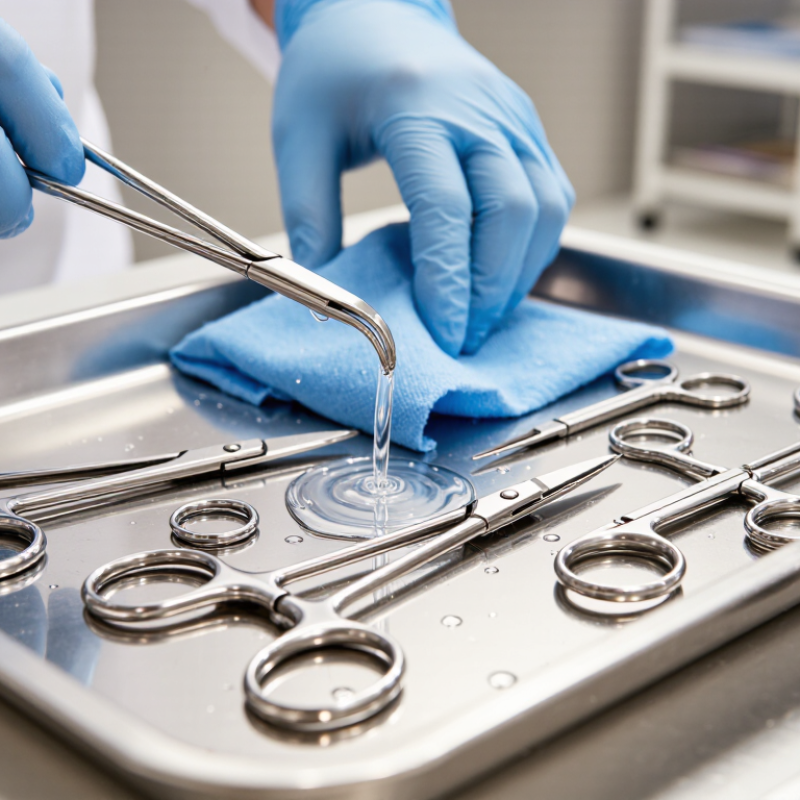
How to Prevent Corrosion on Stainless Surgical Tools 2026?

Time:2026-09-19 Author:Oliver
0%

How to Prevent Corrosion on Stainless Surgical Tools in 2026 begins with a practical truth: stainless steel is resistant, not invincible. Moisture, chloride residues, harsh detergents, and trapped blood can damage a polished instrument. The first question is not “Which coating should we buy?” It is “What happened during reprocessing?” This approach reflects real hospital practice, where corrosion often appears near box locks, serrations, hinges, and narrow lumens.

Dr. William A. Rutala, a recognized infection prevention researcher, has emphasized, “Cleaning is the most important step in the sterilization process.” His statement supports the central principle behind How to prevent corrosion on stainless steel surgical tools. Remove organic material promptly. Follow the instrument manufacturer’s instructions for use. Use a validated, neutral-pH detergent when permitted. Rinse thoroughly with treated water, especially after enzymatic cleaning. Then dry every joint and recess before sterilization. Small droplets can become large problems.

Inspection must remain hands-on. Look for orange spots, rainbow discoloration, rough edges, and stiff hinges under bright light. Do not return questionable tools to service. Separate damaged instruments for evaluation, repair, or replacement. Avoid bleach and unapproved chemicals. Control water quality, detergent concentration, temperature, and exposure time. These details are easy to overlook. That is the weakness. No maintenance plan is perfect, and one rushed drying step can defeat an otherwise careful process. Corrosion prevention therefore requires records, staff training, routine audits, and honest review of failures. Clean steel is not enough. Controlled handling protects both instrument performance and patient safety.

How to Prevent Corrosion on Stainless Surgical Tools 2026?

What Causes Corrosion on Stainless Surgical Tools?

How to Prevent Corrosion on Stainless Surgical Tools 2026?

What Causes Corrosion on Stainless Surgical Tools?

Corrosion usually begins with residue, not the sterilizer itself. Blood, saline, tissue, and detergents can remain inside hinges or box locks. Chloride ions are especially aggressive. They can attack the passive chromium-oxide layer on stainless steel. A small brown spot may signal deeper pitting.

AAMI TIR34 identifies chloride, conductivity, hardness, and silica as important water-quality parameters. High mineral content can leave deposits after washing. Poor rinsing may also trap alkaline detergent films. The CDC states that organic soil must be removed before sterilization because dried residue protects contamination and damages cleaning performance. Stainless steel is resistant, not invincible.

Steam quality matters too. Wet packs, repeated exposure to unsuitable chemicals, and slow drying increase risk. Contact between different metals can create galvanic corrosion, especially when moisture remains between instruments. Scratches from harsh brushes expose less-protected metal. Tiny defects matter.

A practical inspection uses bright light and magnification. Check joints, serrations, and narrow channels first. Do not assume every brown mark is harmless staining. AAMI ST79 and ISO 17664-1 emphasize validated processing, suitable water, thorough rinsing, and complete drying. One difficult lesson remains: faster cleaning is not always safer cleaning. A rushed rinse can create tomorrow’s repair problem.

How to Clean and Decontaminate Surgical Tools Safely

How to Prevent Corrosion on Stainless Surgical Tools 2026?

Safe cleaning and decontamination begin immediately after use. Do not allow blood or tissue to dry on stainless surgical tools. Wipe visible soil at the point of use, then keep instruments moist in a suitable container. Follow the facility’s validated procedure and the tool manufacturer’s instructions. Disassemble hinged instruments before cleaning. Open clamps fully. Use a pH-neutral enzymatic detergent at the correct temperature and concentration. Excessive heat can fix proteins to the surface.

Clean tools beneath the waterline to reduce splashing and aerosol formation. Use soft brushes that cannot scratch polished surfaces. Avoid chlorine products, steel wool, and harsh abrasive powders. These materials may damage the passive protective layer and encourage corrosion.

Rinse thoroughly with treated water, especially around joints and serrations. Dry every surface completely with a lint-free cloth or filtered air. Moisture left inside a box lock can create rust spots overnight. Inspect tools under bright light before sterilization. Look for discoloration, pitting, rough edges, and stiff movement. Remove damaged instruments from service for evaluation.

Which Sterilization Practices Help Prevent Corrosion?

Corrosion prevention begins before sterilization. In daily instrument processing, I have seen tiny rust spots start after cleaning, not during the autoclave cycle. Remove blood and tissue promptly, because dried residue traps chlorides against steel surfaces. Use a neutral-pH or approved enzymatic detergent, following its dilution and contact-time instructions. Strong chemicals can damage protective surfaces.

Rinse instruments thoroughly with treated water, especially after detergent exposure. Hard-water minerals may leave dull deposits and encourage staining. Open hinged tools and separate nested parts before sterilization. Place them in a way that allows steam to contact every surface. Avoid overloading trays. Steam must circulate freely. Keep instruments away from saline, bleach, and other chloride-containing liquids.

Drying matters more than many teams expect. Moisture left inside joints can create dark marks and localized corrosion. Use a validated drying phase, then inspect each tool under bright light. Do not sterilize visibly dirty or damaged instruments. Remove them from service for evaluation. Autoclave cycles should follow the instrument manufacturer’s validated parameters and local clinical requirements. Excessive heat or repeated unsuitable cycles may shorten service life.

Water quality deserves regular review. A filtration problem can quietly affect an entire department. Check trays, chamber surfaces, and instruments for spotting or residue. Some facilities monitor this well; others notice only after complaints. That delay is avoidable. Keep records of cleaning agents, cycle conditions, and recurring defects. These records help connect corrosion with a process change, although they may not reveal every cause.

How to Prevent Corrosion on Stainless Surgical Tools 2026? - Which Sterilization Practices Help Prevent Corrosion?

Sterilization or Processing Practice How It Helps Prevent Corrosion Recommended Control Corrosion Risk if Poorly Controlled Practical Verification
Thorough cleaning before sterilization Removes blood, tissue, saline, lubricants, and other residues that can retain moisture or create localized chemical attack during heating. Clean instruments as soon as practical after use. Open hinged tools, disassemble removable parts, and follow the device manufacturer’s cleaning instructions. Pitting, staining, discoloration, stiff joints, and loss of surface passivity. Use visual inspection, magnification when appropriate, and functional checks before packaging.
Use a neutral or mildly alkaline, instrument-compatible detergent Appropriate detergents remove organic soil without unnecessarily attacking stainless-steel surfaces or joint areas. Follow the detergent concentration, temperature, contact time, and rinsing requirements stated in the product and instrument instructions. Strong acids, strong alkalis, excessive concentration, or prolonged exposure may cause surface damage or accelerate corrosion. Check chemical dosing records and investigate unexpected residue, dullness, or surface etching.
Rinse thoroughly with suitable water Removes detergent, salts, chlorides, and other dissolved contaminants that may remain after cleaning and become concentrated during drying or sterilization. Use water quality appropriate for the facility’s validated process. Purified or demineralized water is commonly used for the final rinse when required by local procedures. Water spots, chloride-related pitting, mineral deposits, and recurring brown or blue staining. Monitor water-quality parameters specified by the facility, such as conductivity, hardness, chloride, or other relevant limits.
Dry instruments completely before packaging Prevents trapped water from remaining in hinges, box locks, cannulations, serrations, and other crevices where oxygen-starved moisture can promote corrosion. Use validated drying equipment or clean, oil-free compressed air suitable for medical-device processing. Pay special attention to hollow and jointed instruments. Flash rust, crevice corrosion, water staining, and corrosion inside channels or joints. Inspect instruments immediately after the cycle and confirm that no visible moisture remains before storage.
Use validated steam sterilization cycles Properly controlled saturated steam sterilizes efficiently while minimizing unnecessary heat exposure and condensate-related problems. Use the cycle parameters specified for the instrument and sterilizer. Common reference cycles include 121 °C gravity and 132–135 °C dynamic-air-removal cycles, but exposure time and load requirements must be validated. Overprocessing, wet packs, inadequate air removal, or excessive condensate can increase staining and corrosion risk. Review physical cycle records, chemical indicators, biological monitoring, and load-specific documentation according to facility policy.
Complete the sterilizer drying phase Removes residual condensate from packages and instrument surfaces before handling and storage. Do not shorten the validated drying phase. Allow packs to cool in a clean, low-humidity area before moving or stacking them. Wet packs, corrosion during storage, package damage, and contamination risk. Quarantine wet or visibly compromised packs and identify the cause before release.
Avoid chlorides and halide-containing residues Chloride ions can locally break down the passive oxide layer on stainless steel, especially in warm, wet, or crevice conditions. Prevent contact with saline, bleach, chloride-containing disinfectants, and chloride-contaminated water unless specifically approved and immediately rinsed. Localized pitting that may continue beneath small surface marks and become difficult to detect. Trend corrosion findings by load, water source, detergent, and clinical area to identify chloride exposure.
Lubricate hinges only with a water-soluble instrument lubricant when indicated Maintains smooth movement and helps protect articulated areas without leaving an unsuitable film that can interfere with cleaning or sterilization. Apply sparingly after cleaning and before packaging, following the instrument instructions. Do not use household oils or petroleum products unless specifically approved. Residue buildup, impaired sterilant contact, sticky joints, and increased retention of soil or moisture. Confirm free movement and absence of visible lubricant pooling after processing.
Prevent contact between dissimilar metals Reduces galvanic corrosion when different metals are electrically connected in the presence of moisture or conductive residues. Separate instruments during cleaning and packaging when practical, and follow the approved tray configuration. Localized discoloration, accelerated attack at contact points, and damage to delicate cutting surfaces. Inspect contact areas and review tray loading when corrosion appears only on particular instrument combinations.
Inspect, maintain, and remove damaged tools from service Early detection prevents pits, scratches, rough surfaces, and damaged joints from trapping soil and spreading processing problems. Inspect after cleaning and before use. Do not polish aggressively or use abrasive materials that can remove the passive layer or alter instrument geometry. Progressive pitting, impaired function, retained bioburden, and premature instrument failure. Document findings, repair or replace unsuitable instruments, and investigate repeated corrosion rather than treating only the visible mark.
Important operating note: Sterilization temperature and exposure time must always be selected according to the instrument manufacturer’s validated instructions, the sterilizer’s validated cycle, and applicable healthcare-processing requirements. Corrosion prevention depends on the complete process: prompt cleaning, compatible chemistry, thorough rinsing, complete drying, correct packaging, validated sterilization, and routine inspection.

How to Dry, Store, and Handle Tools Without Damage

How to Prevent Corrosion on Stainless Surgical Tools 2026?

Stainless steel still needs disciplined care. Moisture, saline residue, blood, and detergent film can trigger staining or pitting. The CDC Guideline for Disinfection and Sterilization recommends cleaning instruments promptly and drying them completely before storage. AAMI ST79 also requires inspection, cleaning, drying, and package checks within sterile processing workflows. One overlooked hinge can retain a small water droplet for hours. That is enough to challenge a polished surface.

Dry tools with a clean, lint-free cloth and filtered, oil-free compressed air. Open box locks and separate nested instruments. Do not stack warm tools tightly after sterilization. Trapped heat can create condensation inside trays. Store dry instruments in closed cabinets, away from sinks, chemical fumes, and fluctuating temperatures.

The FDA notes that damaged or compromised device surfaces can affect cleaning and reprocessing performance. Inspect joints, serrations, and tips under bright light. A dull orange mark should not be dismissed as harmless discoloration.

Tips: Keep saline-soaked tools separate from other instruments. Rinse residues with treated water as soon as possible. Follow the detergent manufacturer’s dilution and contact time. Never use steel wool or abrasive powders. Record recurring corrosion by tray, location, and process cycle. That record may expose a water-quality or drying problem. I would also review habits, not only equipment. Staff may dry the outside while missing the hinge. That small gap deserves attention.

Sources: CDC, Guideline for Disinfection and Sterilization in Healthcare Facilities; AAMI ST79; FDA, Reprocessing Medical Devices in Health Care Settings.

How to Inspect, Maintain, and Restore Corroded Instruments

Corrosion on stainless surgical tools often begins as a small orange mark near a hinge, jaw, or box lock. Inspection must happen after cleaning and before packaging. Under strong light, check for pitting, discoloration, rough edges, stiff joints, and trapped tissue. A magnifier can reveal damage that normal inspection misses. WHO decontamination guidance recommends inspecting instruments carefully and using magnification when necessary.

Maintenance should match the instrument’s material and manufacturer instructions. Rinse promptly after use, because dried blood and saline accelerate staining and pitting. Use neutral-pH cleaning chemistry, soft brushes, and low-mineral water when available. Never force a stiff hinge. Apply a medical-grade, water-soluble instrument lubricant after cleaning. CDC guidance recommends mechanical monitoring for every sterilization load and biological monitoring at least weekly, preferably every load. These checks do not repair corrosion, but they expose process failures.

Light surface discoloration may respond to an approved stainless-steel instrument cleaner and controlled polishing. Pitted metal, cracked joints, weakened tips, or recurring rust require evaluation by qualified repair personnel. Do not sand aggressively; it can remove protective surfaces and alter precision. I have seen instruments returned to service too quickly after “cleaning.” That judgment is risky. A 2023 healthcare reprocessing review in Infection Control & Hospital Epidemiology emphasized that cleaning quality strongly affects sterilization reliability. Record the finding, isolate the tool, and reassess the cleaning, rinsing, drying, and water-quality process.

FAQS

What should happen immediately after using stainless surgical tools?

Wipe away visible blood and tissue promptly. Keep instruments moist in a suitable container. Never let soil dry.

How should hinged instruments be prepared for cleaning?

Disassemble them when possible. Open clamps fully. Clean joints, serrations, and box locks beneath the waterline.

Which cleaning materials help prevent corrosion?

Use a neutral-pH enzymatic detergent at the correct temperature and concentration. Choose soft brushes and treated water.

Which cleaning products should be avoided?

Avoid chlorine products, steel wool, and harsh abrasive powders. They can damage the protective surface.

How can hidden moisture cause rust?

Water trapped inside a box lock may create orange rust spots overnight. Dry every surface thoroughly with lint-free cloths or filtered air.

What should staff check before sterilization?

Inspect tools under bright light. Look for pitting, discoloration, rough edges, trapped tissue, and stiff movement.

Can a lightly discolored instrument be restored?

An approved stainless-steel cleaner and controlled polishing may help surface discoloration. Aggressive sanding is unsafe.

What should happen when an instrument has pits or cracked joints?

Remove it from service and isolate it for qualified evaluation. Do not force stiff hinges or return tools too quickly.

How can a facility investigate recurring rust?

Review cleaning, rinsing, drying, detergent measurements, and water quality. Record findings and recheck the process.

Are sterilization checks enough to solve corrosion?

No. Monitoring can reveal process failures, but it cannot repair damaged metal. Cleaning quality still matters greatly.

Conclusion

Corrosion on stainless surgical tools can result from residual blood, saline, harsh chemicals, mineral deposits, high humidity, or contact with dissimilar metals. How to prevent corrosion on stainless steel surgical tools begins with immediate cleaning after use, thorough decontamination, and careful rinsing with suitable water. Instruments should be opened, separated, and cleaned according to their design, while abrasive pads and overly concentrated chemicals should be avoided. Proper lubrication may also protect moving joints without interfering with sterilization.

Effective sterilization depends on following validated cycles, correct loading, and appropriate temperature and exposure times. After sterilization, tools must be completely dried, inspected for stains, pitting, cracks, or damaged surfaces, and stored in a clean, dry environment with sufficient space. Regular maintenance helps identify early corrosion before it affects performance. Light surface discoloration may sometimes be treated with an approved instrument-care method, but deeply pitted or structurally damaged tools should be removed from service and evaluated by qualified personnel.

Oliver

Oliver

Oliver is a seasoned marketing professional with a wealth of expertise in driving brand awareness and engagement. With a deep understanding of our company's product offerings, he consistently delivers high-quality content that enriches our professional blog. His insights not only shed light on......